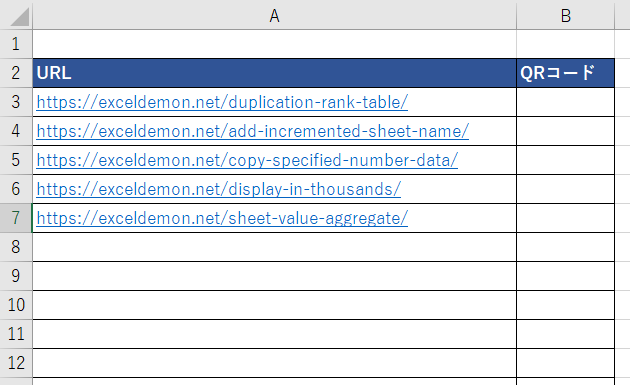
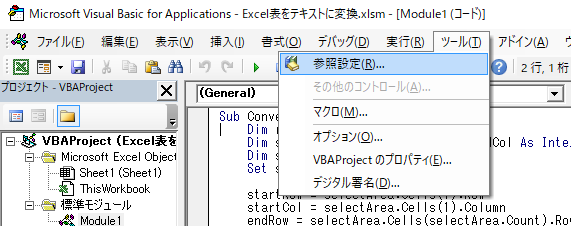
④Microsoft Visual Basic for Applications」にて以下のコードを記載
Sub CreateQrcode()
    '開始行
    Dim firstRow As Long: firstRow = 3
    '最終行の取得
    Dim lastRow As Long: lastRow = Cells(Rows.Count, 1).End(xlUp).Row

    'firstRow~lastRowまで繰り返し(途中エラーが出た場合も止めずに最後まで処理)
    On Error Resume Next
        For i = firstRow To lastRow

            'QRコード表示セルの高さなどを調整
            With Cells(i, "B")
                .RowHeight = 65
                .VerticalAlignment = xlTop '上詰め
            End With

            'GoogleAPIでQRコードを作成
            Set qr = ActiveSheet.Pictures _
                    .Insert("http://chart.apis.google.com/chart?cht=qr&chs=80x80&chl=" _
                            + Cells(i, "A").Value)

            'QRコードの表示位置を指定
            With qr
                .Top = Cells(i, "B").Top + 2
                .Left = Cells(i, "B").Left + 2
            End With
        Next i
    On Error GoTo 0
End Sub
④ 「Microsoft Visual Basic for Applications」にて以下のコードを記載
Sub ConvertTable()
Dim result As String
Dim startRow, startCol, endRow, endCol As Integer
Dim selectArea As Range
Set selectArea = Selection
startRow = selectArea.Cells(1).Row
startCol = selectArea.Cells(1).Column
endRow = selectArea.Cells(selectArea.Count).Row
endCol = selectArea.Cells(selectArea.Count).Column
Dim widthDic As Object
Set widthDic = CreateObject("Scripting.Dictionary")
Dim maxWidth As Integer: maxWidth = 0
Dim cellVal As String
Dim margin As Integer
' 各列毎の最大幅を配列で保持
For j = startCol To endCol Step 1
For i = startRow To endRow Step 1
cellVal = Cells(i, j).Value
If IsNumeric(cellVal) And Cells(i, j).NumberFormatLocal = "#,##0" Then
cellVal = Format(cellVal, "#,#")
End If
If maxWidth < LenB(StrConv(cellVal, vbFromUnicode)) Then
maxWidth = LenB(StrConv(cellVal, vbFromUnicode))
End If
Next
widthDic.Add j, maxWidth
maxWidth = 0
Next
' 表文字列の作成
For i = startRow To endRow Step 1
' 線だけの行を書き込み
For j = startCol To endCol Step 1
If i = startRow Then
If j = startCol Then
result = result & "┌"
Else
result = result & "┬"
End If
Else
If j = startCol Then
result = result & "├"
Else
result = result & "┼"
End If
End If
result = result & String(Application.WorksheetFunction.RoundUp(widthDic.Item(j) / 2, 0), "─")
If i = startRow And j = endCol Then
result = result & "┐"
ElseIf i <> startRow And j = endCol Then
result = result & "┤"
End If
Next
result = result & vbCrLf
' 値の行を書き込み
For j = startCol To endCol Step 1
result = result & "│"
cellVal = Cells(i, j).Value
If IsNumeric(cellVal) And Cells(i, j).NumberFormatLocal = "#,##0" Then
cellVal = Format(cellVal, "#,#")
End If
margin = widthDic.Item(j) - LenB(StrConv(cellVal, vbFromUnicode))
margin = margin + widthDic.Item(j) Mod 2
If IsNumeric(cellVal) Then
result = result & Space(margin)
result = result & cellVal
Else
result = result & cellVal
result = result & Space(margin)
End If
If j = endCol Then
result = result & "│"
End If
Next
result = result & vbCrLf
Next
' 最下部の線を書き込み
For j = startCol To endCol Step 1
If j = startCol Then
result = result & "└"
Else
result = result & "┴"
End If
result = result & String(Application.WorksheetFunction.RoundUp(widthDic.Item(j) / 2, 0), "─")
If j = endCol Then
result = result & "┘"
End If
Next
'表文字列をクリップボードに格納する
With New MSForms.DataObject
.SetText result
.PutInClipboard
End With
End Sub
⑥「Microsoft Visual Basic for Applications」にて以下のコードを記載
Sub StartSeatSelection()
Dim noCol As Integer: noCol = 1 '★
Dim nameCol As Integer: nameCol = 2 '★
Dim heightCol As Integer: heightCol = 3 '★
Dim startRow As Integer: startRow = 2 '★
Dim lastRow As Integer: lastRow = ActiveSheet.UsedRange.Row + ActiveSheet.UsedRange.Rows.Count - 1
Dim studentList As Dictionary
Set studentList = New Dictionary
Dim tempStudentList As Dictionary
Set tempStudentList = New Dictionary
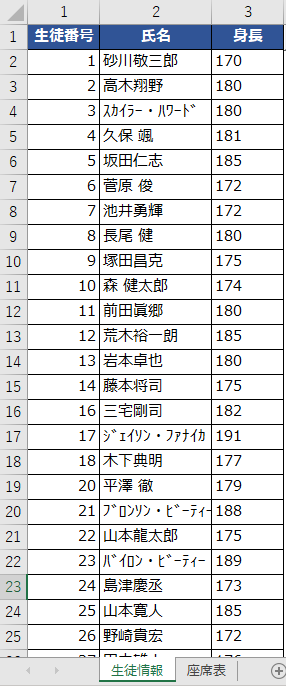
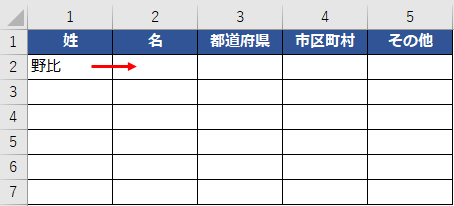
'「生徒情報」シートの内容を1行ずつ読み込み、studentListに身長順で格納します。
For i = startRow To lastRow Step 1
Set tempStudentList = studentList
Set studentList = New Dictionary
Dim no As String
no = Cells(i, noCol).Value
Dim name As String
name = Cells(i, nameCol).Value
Dim height As String
height = Cells(i, heightCol).Value
If IsEmpty(no) Then
MsgBox "生徒番号が空欄です。"
End If
If Not IsNumeric(no) Then
MsgBox no &amp; ":生徒番号には数値を指定してください。"
End If
If IsEmpty(name) Then
MsgBox "氏名が空欄です。"
End If
If IsEmpty(height) Then
MsgBox "身長が空欄です。"
End If
If Not IsNumeric(height) Then
MsgBox height &amp; ":身長には数値を指定してください。"
End If
If tempStudentList.Count &gt; 0 Then
For Each tempStudent In tempStudentList.Items
If (tempStudent(2) &gt; height Or (tempStudent(2) = height And tempStudent(0) &gt; no)) And Not studentList.Exists(no) Then
studentList.Add no, Array(no, name, height)
End If
studentList.Add tempStudent(0), Array(tempStudent(0), tempStudent(1), tempStudent(2))
Next tempStudent
End If
If Not studentList.Exists(no) Then
studentList.Add no, Array(no, name, height)
End If
Next
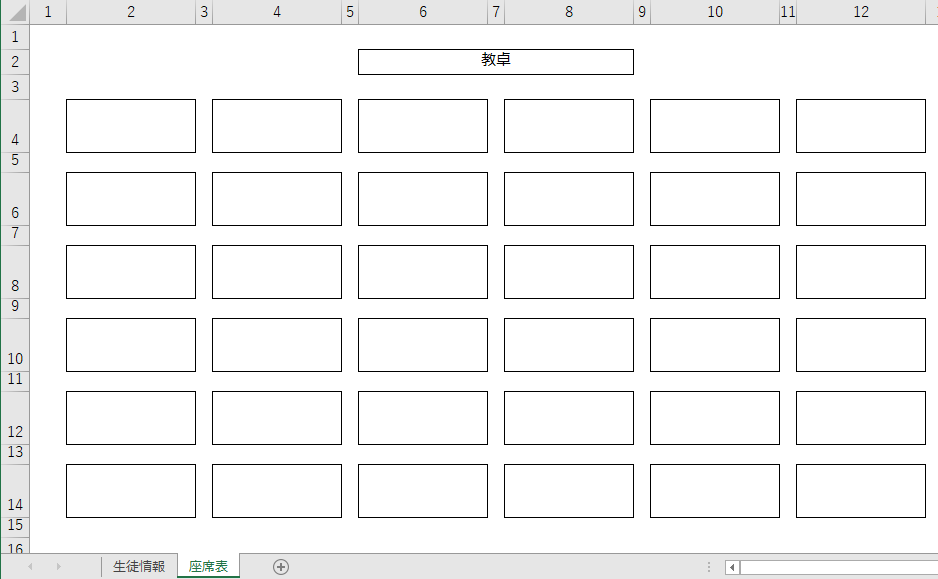
'studentListを基に、座席に名前をあてはめます。
Dim startSheetRow As Integer: startSheetRow = 4 '★
Dim lastSheetRow As Integer: lastSheetRow = 14 '★
Dim startSheetCol As Integer: startSheetCol = 2 '★
Dim lastSheetCol As Integer: lastSheetCol = 12 '★
Dim targetRow As Integer
Dim targetCol As Integer
Dim studentListCnt As Integer: studentListCnt = 0 '★
For targetRow = startSheetRow To lastSheetRow Step 2
For targetCol = startSheetCol To lastSheetCol Step 2
Worksheets("座席表").Cells(targetRow, targetCol).Value = studentList.Items(studentListCnt)(1)
studentListCnt = studentListCnt + 1
Next targetCol
Next targetRow
End Sub
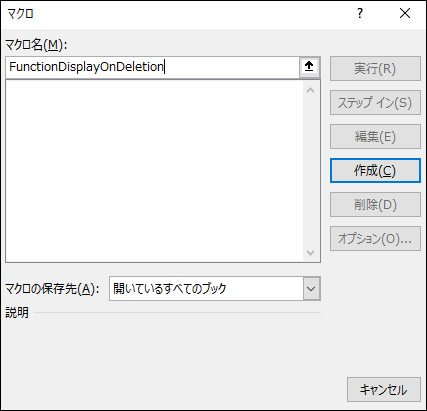
④ Microsoft Visual Basic for Applications」にて以下のコードを記載
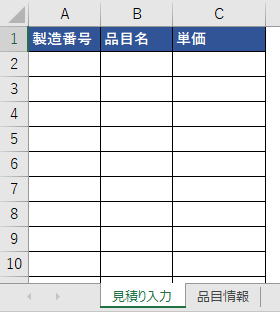
Sub FunctionDisplayOnDeletion()
Dim searchValueRow As Integer: searchValueRow = 1 '★検索値列
Dim startFuncRow As Integer: startFuncRow = 2 '★VLOOKUP関数設定開始行
Dim startFuncCol As Integer: startFuncCol = 2 '★VLOOKUP関数設定開始列
Dim endFuncCol As Integer: endFuncCol = 3 '★VLOOKUP関数設定終了列
Dim c As Range, i As Long
For Each c In Selection
If c.Row &gt;= startFuncRow _
And c.Column &gt;= startFuncCol _
And c.Column &lt;= endFuncCol Then
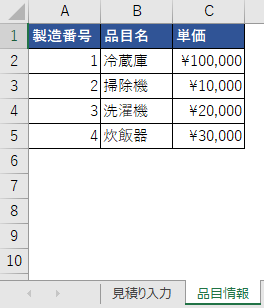
c.Value = "=IFERROR(VLOOKUP(" &amp; Cells(c.Row, searchValueRow).Address(False, False) &amp; ",品目情報!$A$2:$C$5," &amp; c.Column &amp; ",FALSE),"""")"
Else
c.Value = ""
End If
Next c
End Sub
Sub AutoActivateSheet_Name()
'DeleteKeyを押すと「FunctionDisplayOnDeletion」マクロ実行
Application.OnKey "{Delete}", "FunctionDisplayOnDeletion"
Application.OnKey "^{Delete}", "FunctionDisplayOnDeletion"
End Sub
Sub AutoDeactivateSheet_Name()
'DeleteKeyへの割り当て解除
Application.OnKey "{Delete}"
Application.OnKey "^{Delete}"
End Sub
Sub Auto_Open()
'「見積り入力」シートがアクティブになったら「AutoActivateSheet_Name」マクロ実行
Worksheets("見積り入力").OnSheetActivate = "AutoActivateSheet_Name"
'「見積り入力卸」シート以外がアクティブになったら「AutoDeactivateSheet_Name」マクロ実行
Worksheets("見積り入力").OnSheetDeactivate = "AutoDeactivateSheet_Name"
End Sub
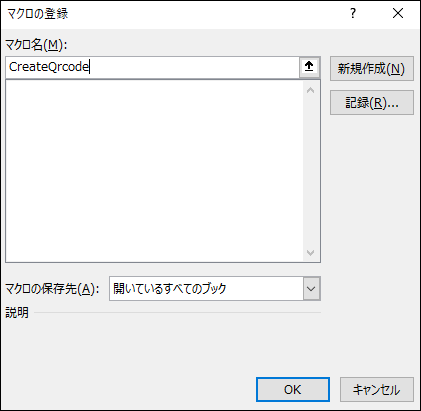
③ 「Alt + F8」を押して表示される以下の画面で「マクロ名」を「SearchGoods_InputInventoryQuantity」として「作成」を押す
④ Microsoft Visual Basic for Applications」にて以下のコードを記載
Public enterFlg As Boolean
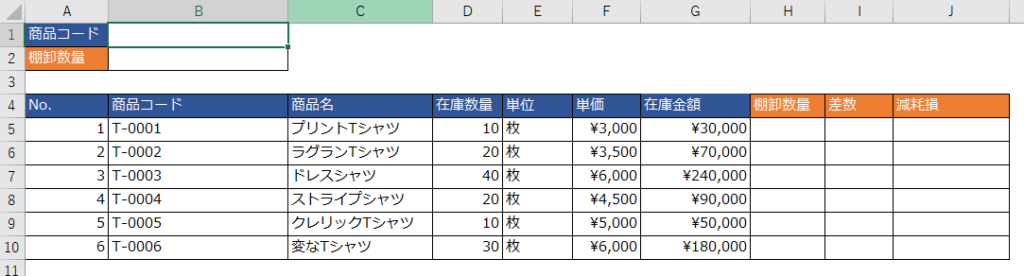
Sub SearchGoods_InputInventoryQuantity()
'検索文字入力行・列
Dim searchValueRow As Integer: searchValueRow = 1 '★
Dim searchValueCol As Integer: searchValueCol = 2 '★
'検索対象列
Dim searchTargetCol As Integer: searchTargetCol = 2 '★
'検索文字'
Dim searchValue As String: searchValue = Cells(searchValueRow, searchValueCol).Value
'棚卸数量入力行・列
Dim inventoryQuantityRow As Integer: inventoryQuantityRow = 2 '★
Dim inventoryQuantityCol As Integer: inventoryQuantityCol = 2 '★
'棚卸数量転記対象列
Dim copyQuantityTargetCol As Integer: copyQuantityTargetCol = 8 '★
'商品コード未入力メッセージ'
Dim codeNotEnteredMessage As String: codeNotEnteredMessage = "商品コードを入力してください" '★
'重複メッセージ'
Dim duplicateMessage As String: duplicateMessage = "既に入力があります" '★
'開始行
Dim startRow As Integer: startRow = 5 '★
'終了行
Dim lastRow As Integer: lastRow = ActiveSheet.UsedRange.Row + ActiveSheet.UsedRange.Rows.Count - 1
'アクティブCellが商品コードまたは棚卸数量欄でなければアクティブセルの移動のみ
Dim activeRow As Integer: activeRow = ActiveCell.Row
Dim activeCol As Integer: activeCol = ActiveCell.Column
'商品コード検索
If activeRow = searchValueRow And activeCol = searchValueCol Then
For i = startRow To lastRow Step 1
If Cells(i, searchTargetCol).Value &amp;amp;lt;&amp;amp;gt; searchValue And searchValue &amp;amp;lt;&amp;amp;gt; "" Then
Rows(i).Hidden = True
Else
Rows(i).Hidden = False
End If
Next
Cells(activeRow + 1, activeCol).Select
'棚卸数量入力(1回目)
ElseIf activeRow = inventoryQuantityRow And activeCol = inventoryQuantityCol And enterFlg = False And Cells(inventoryQuantityRow, inventoryQuantityCol) &amp;amp;lt;&amp;amp;gt; "" Then
If Cells(searchValueRow, searchValueCol).Value = "" Then
MsgBox codeNotEnteredMessage
Cells(searchValueRow, searchValueCol).Select
Exit Sub
End If
For i = startRow To lastRow Step 1
If Cells(i, copyQuantityTargetCol).Value = "" And Rows(i).Hidden = False Then
Cells(i, copyQuantityTargetCol).Value = Cells(inventoryQuantityRow, inventoryQuantityCol)
ElseIf Cells(i, copyQuantityTargetCol).Value &amp;amp;lt;&amp;amp;gt; "" And Rows(i).Hidden = False Then
MsgBox duplicateMessage
Exit Sub
End If
Next
enterFlg = True
'棚卸数量入力(2回目)
ElseIf activeRow = inventoryQuantityRow And activeCol = inventoryQuantityCol Then
For i = startRow To lastRow Step 1
Rows(i).Hidden = False
Next
Cells(inventoryQuantityRow, inventoryQuantityCol) = ""
Cells(searchValueRow, searchValueCol).Select
enterFlg = False
Else
Cells(activeRow + 1, activeCol).Select
Exit Sub
End If
End Sub
Sub Auto_Open()
'「実地棚卸」シートがアクティブになったら「AutoActivateSheet_Name」マクロ実行
Worksheets("実地棚卸").OnSheetActivate = "AutoActivateSheet_Name"
'「実地棚卸」シート以外がアクティブになったら「AutoDeactivateSheet_Name」マクロ実行
Worksheets("実地棚卸").OnSheetDeactivate = "AutoDeactivateSheet_Name"
End Sub
Sub AutoActivateSheet_Name()
'Enterを押すと「SearchGoods_InputInventoryQuantity」マクロ実行
Application.OnKey "~", "SearchGoods_InputInventoryQuantity"
Application.OnKey "{Enter}", "SearchGoods_InputInventoryQuantity"
End Sub
Sub AutoDeactivateSheet_Name()
'テンキーのEnterへの割り当て解除
Application.OnKey "{Enter}"
'大きいEnterへの割り当て解除
Application.OnKey "~"
End Sub